Following rejection of the material, you need to create a return delivery to return the material to the vendor. A customer number is assigned to the vendor as a return customer.
Steps:
1) SAP Menu User Tcode
Option 1: SAP Graphical User Interface (SAP GUI)
Logistics -> Quality Management -> Quality Notification -> Worklist -> Notification -> Change Data
Transaction code: QM10
Option 2: SAP NetWeaver Business Client (SAP NWBC) via business role
Business role BP: Quality Specialist (SAP_BPR_QUALMGR-S)
Business role menu: Quality Management -> Quality Notifications -> Change list of quality notifications
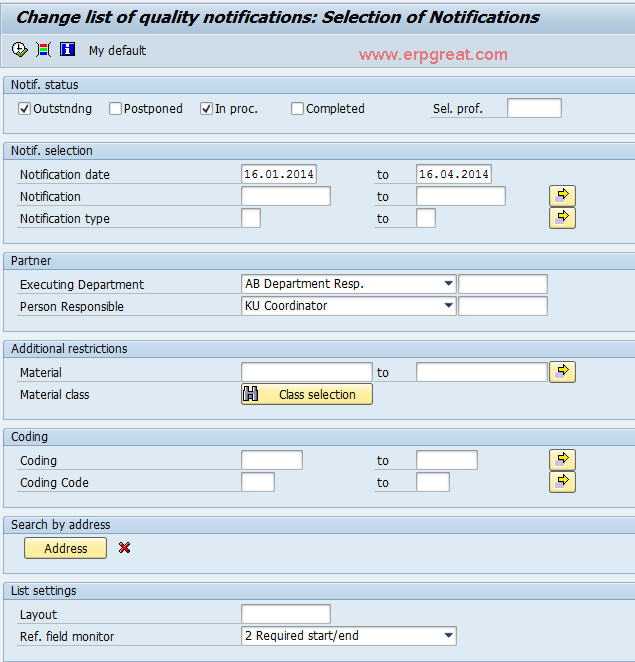
2) On the Change List of quality notifications: Selection of Notifications screen, do the following entries:
| Field name | Description | User action and values | Comment |
| Outstanding | Set indicator | ||
| Notification Date | Use the date system proposed |
3) Choose Execute to load the notifications.
4) Select the applicable notification, and choose Notification .
5) On the Change Notification: Vendor-Rel. Defect screen, choose QM: Activity Description in the Action box.
6) On the Internal Note screen, enter a description for example, Return Delivery.
7) Choose Enter to confirm your entries.
8) On the Action box, choose Log Telephone Call, and make the following entries in the Outgoing Call window:
| Field name | Description | User action and values | Comment |
| Start | Use the date system proposed | ||
| End | Use the date system proposed | ||
| Conversation status | Reached | ||
| Subject of conversation | Description |
9) Confirm with Enter.
10) On the Change Notification: Vendor-Rel. Defect screen, choose the green flag Put in Process.
11) Save your entries.
12) On the Change List of Qual. Notification: List of Notifications screen, select your notification, and choose Notification.
13) On the Change Notification: Vendor-Rel. Defect screen, choose Create Return Delivery in the Action box.
14) On the Create Return Delivery screen, enter 0003 in the Reason for Movement field and 1060 in the Stor.loc field.
15) Choose Enter to confirm your entries.
16) Confirm the following warning message with Yes.
17) The system then creates the return delivery with the message Return delivery created with number xxxxxxxxxx.
18) Choose Back twice to return to the SAP Easy Access
screen.
If an error occurs during the last step of delivery creation,
go back to the SAP Easy Access screen and repeat this step.
Outcome:
The quality notification has been entered into the system and return delivery has been created.